Materials:
Fabric for patchwork on top. I used 3 yards of 1/4 yard squares for my picnic quilt, and scraps totalling around 1 1/4 yard for the activity mat.
Old or thrifted sheet for bottom
Scissors, Needle, thread and sewing machine

Step 1: Cut your fabric into desired size squares. I cut 12- 1/4 yard squares for my picnic blanket and I cut scraps into 3 columns of the same width for this smaller mat. Then lay your sheet down, and lay your squares on top in the order you wish to sew them. This will give you a rough idea of how it will look.
 Step 2: Sew the columns (or rows if you desire) of squares together as straight as possible. I didn't pin them, but I am brave like that. So pin the squares together if it helps. ;)
Step 3: Iron the columns. Line them up (as in picture above). If you have same-sized squares it is important to line up the squares in the middle of the column. Once you have them where you like, place one column on top of the other RIGHT SIDES TOGETHER. That means, make sure the backs of the fabric are facing out. And pin them together starting in the middle and working your way down. I pinned the first two columns, sewed them together and then pinned the last column in the same manner (starting from the middle with right sides together) and sewed it.
Step 4: Iron the entire patchwork- right side up.
Step 5: Lay the patchwork on top of sheet (iron sheet if necessary) RIGHT SIDES TOGETHER and start pinning!! I pinned about every 4-5 inches, starting at the top of the quilt, working around the edges and through the middle. Pin in between the squares, and on the squares... pin everywhere!!! I know it is a pain, but this will keep the patchwork and the sheet even and together while you sew.
Step 6: Sew around the outside of the entire quilt, LEAVING A 5 inch OPENING along one edge of the quilt for turning right-side out. Remove the pins that you placed along the edge as you go.
Step 7: Remove all pins (I forgot this step and it was very pokey!!!)
Step 8: Pull entire quilt through your 5 inch opening.
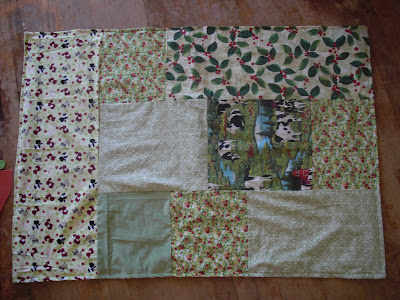
Step 9: Sew along the outside of the entire quilt, starting at the opening you left. Feel free to iron it flat before doing so, as it will probably make it easier. Don't worry too much if it isn't perfect... NO ONE WILL NOTICE. Unless of course, they have no life. And it should look something like this:
 Or this:
 Step 10: Go have a picnic!!! :)
2 comments:
Oh my goodness! Thanks for posting this and the personal shout out! I really want to give this a try. I think I may just be able to do it even though I am SO not skilled enough! :)
Yeah I posted it just for you! And it is really not too terribly hard... I would consider this a beginning project. Just pick some really awesome fabric and no one will question the skill that went into it. lol.
Post a Comment